Tuesday, April 30, 2013

Week 41: Malta

Umm, where is Malta?


I'm glad you asked. ;)  Get a map of the world.  Go ahead, I'll wait.  Ready?  Now find Italy (the boot), then Sicily (the rock that the boot is kicking), then look south a little - see that little dot??  That's Malta!  A teeny- tiny little group of islands in the Mediterranean Sea. 


The most Southern country in Europe and also a place more packed with historical sites than possibly anywhere else in the world.  The whole of the capital city of Valletta ( 35.90°N/ 14.51°E) is considered a World Heritage Site.

 
Valletta - Capital of Malta
Since the first people immigrated there from Sicily in about 5,000 BC, the citizens have been raising livestock, growing grains and living off the sea.  There is some evidence, like underwater archways and structures, that support the idea that the legendary city of Atlantis was actually another of the islands in the Malta archipelago! 


The location of the islands and the natural deep harbors made Malta a very prized strategic location for both the North Africans and the Greeks and Romans.   In 1530, the Holy Roman Emperor, Charles V, gave control of Malta to the Order of the Knights of St. John.  The knights built a renowned hospital, churches, fortresses and greatly expanded maritime trade for the islands.  Their reign was considered Malta's "Golden Period".  The Knights ruled the islands from 1530 until 1798, when Napoleon Bonaparte attacked and won control of the country.  Luckily, many of the historical buildings and fortified villages still remain standing for tourists and visitors to see.  

Malta is an interesting country considering it's size.  I'm intrigued to learn more and I hope you are too.  I've got a great sounding recipe to make and a lesson in speaking Maltese.  We are going to make a Maltese Cross, and maybe watch the Maltese Falcon!!
Stay tuned :)   

Saturday, April 27, 2013

Field Trip!

Happy Koninginnedag!


Queen Beatrix of the Netherlands

It's Queen's Day in the Netherlands on the same week we just have to be studying about them!!  Isn't that a wonderful coincidence!!  Now we got to celebrate a great new holiday!  April 30th is Queen Mother Juliana's birthday and is an annual public holiday in the Netherlands.  The current reigning Queen Beatrix continues the tradition in April (even though her birthday is in January) and the whole country has a grand outdoor party.  There are dances and concerts, flea markets called vrijmarkt, and feasts.  The official color of the Netherlands is orange, and like St. Patrick's Day in Ireland, there is orange food, orange clothes, orange drink, etc. etc.


The Dutch culture in San Francisco is apparently going strong because they had quite a rockin' little festival going on today in beautiful Golden Gate Park, in the shadow of a HUGE windmill!!! Does it get any better?  Oh, yeah it does :)  Check out the fun we had...

Food! Next pic shows one of each :)
There were lots of food booths selling cookies, cakes and candies also!


They were pretty yummy!
Games for the kids!!
Cheek Flags!
 
People actually wearing wooden shoes!


Dutch art masterpieces!  Here is my daughter as The Girl with a Pearl Earring by Johannes Vermeer
And also as the Queen! (The King looks like quite a catch!)


The windmill actually works!  And look at the size of the cheese!
 
 
There was a beer garden
and a real garden with GIANT CARROTS!
My son enjoyed the really big shoe :)
 
and my daughter won some really tiny ones at the games!
We had a blast and really felt like we had immersed ourselves in the Netherlands!  Once again I am so thankful that I started this blog because we are finding so many wonderful activities while learning about the wonderful world we share!! 

Oh yeah, the had a small vrijmarkt (flea market) and this is what the kids (and I) bought!  It's so AWESOME!!! 
I just wish we had it before we did Egypt week :)
 

Thursday, April 25, 2013

On the Menu: Dutch Food

Eet Smakelijk!!

No, that's not what we're making for dinner, it's the Dutch phrase for "enjoy your meal"!!  The Netherlands are known for making some of my favorite types of food- cheese and licorice.  Not together, of course, that would be gross. 

The Dutch have been making cheese since 400 A.D. and are one of the largest exporters of cheese in the world.  Edam, gouda, beemster are a few examples.  There are markets set up just to sell cheese!


The people of the Netherlands also have a great fondness for licorice.  They have over 80 types of licorice, ranging from sweet to salty, chewy to hard.  I would definitely go crazy in their candy stores!!


Stamppot
 
The typical cuisine of the Netherlands is pretty simply prepared.  A very common dish is "stamppot", basically mashed potatoes mixed with mashed vegetables.  This is served with sausages or braised meat.  Soups and stews are very popular.  Sometimes they are almost the same thing- Dutch pea soup is traditionally so thick that a wooden spoon will stand straight up in the pot!  We made another traditional soup for our weekly recipe- Brown Bean Soup.

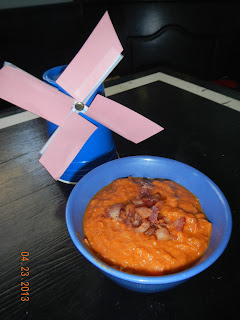
Bruine Bonen Soep (Brown Bean Soup)
recipe found on About.com
For the recipe you will need:
  • 8oz bacon - cubed
  • 3 shallots - chopped
  • 2 carrots- diced
  • 1 leek- sliced in rings
  • 1 T ground paprika
  • 3 cans of pinto beans- drained and rinsed
  • 12oz. tomato puree
  • 3 cups beef stock
  • 2 bay leaves
  • salt & pepper
  • Worcestershire sauce
1. Fry the bacon in a large soup pot.  When crispy, remove some of the bacon for later.
2. Add the rest of the ingredients (except salt, pepper and Worcestershire).  Bring to boil, turn down heat and simmer for 20 minutes at least, longer wouldn't hurt but you want the veggies soft.
3. Blend the soup with in a blender, food processor, or with an immersion blender until it's a little chunky but mostly smooth.
4.  Taste the soup and add seasonings to your taste.  Top with bacon and enjoy!

This soup was simple but good.  It was sweeter than I expected it to be, very nutritious and super easy to make.  I would've liked a little more, I don't know? Oomph? I'm used to pretty flavorful foods and this was just, well, BEAN SOUP. 

This weekend I found out there is a Dutch festival in SF!!  I swear I didn't plan that at all, but I am sooooo excited!  Apparently, April 30 is Queen's Day and the celebration is going to be held at the big windmill near the tulip gardens in Golden Gate Park!!  I will be sure to try some of the (hopefully) delicious snacks and beverages and post as much as I can!!  I love a good field trip!!!!!

Wednesday, April 24, 2013

Windmills in the Netherlands

Got wind?


I guess they must have a lot of it in the Netherlands because they are famous for their windmills.  At one point the country had over 10,000 windmills dotting the land!!  Now they have about 1,000 that are still standing and some of them are even still in use. 


Greek windmills
Windmills have been credited to the Greeks, who are believed to have invented them sometime around 250 BC.  From there the idea travelled around quite a bit getting refined.  The mills were used to grind grain but since the blades were fixed in one direction, they would only work if the wind was blowing from the right way!  If only Mother Nature could be that predictable!


Sometime between the 1200s and 1300s, they developed the "post mill" that could be rotated to face the direction of the wind- genius!
Soon, these popped up all over Europe.  But they really became popular when Cornelius Corneliszoon van Uitgeest, from the Netherlands, found a way use the wind power to power a saw for cutting wood.  The Dutch were beginning a major exploration of the Indies and needed many ships.  The windmill-powered saw made that job much easier.  But windmills also helped the Netherlands another way.

As I mentioned before, the Netherlands is a very low-lying country.  For over 2,000 years they have been fighting the North Sea over land.  The sea was winning until the Dutch devised a way to hold back the sea using dikes (walls), canals and windmill-powered pumps to create mineral rich land.  Miles and miles of these dikes and canals form the coast of the Netherlands and if these dikes or pumps should fail then many parts of the country would be underwater pretty quickly!!

So windmills are more than just a pretty tourist attraction- they changed the country in more ways than one!!  So we made our own little windmills :)

Windmills
For the project you will need:

  • large plastic cups (1 per mill)
  • plastic straws (2 per)
  • brass fasteners (1 per)
  • paper for sails
  • tape
  • pushpin or skewer to poke holes
1. Cut the straws to the length you want.  Ours were bendy straws so we cut at the bend. 

2.  Find the center of the length and poke a hole in each straw.  Insert the brass fastener through each straw making a  + 

3. Cut 4 strips of paper about 1.5 inches wide and as long as your sail arms (straws).  Tape them onto the straws. 

4. Turn the plastic cup upside down and poke a hole where you want to attach the sails.


5.  Now you have your very own teeny tiny windmill! 

Where we live it's ALWAYS windy so this could come in handy! Hmmm, maybe on a bigger scale?!

Monday, April 22, 2013

Week 40: The Netherlands

Week 40!?!

I really can't believe I made it to week 40 already!!  I have to say this is the longest I've ever stuck with something that was optional :)  I hope you are enjoying learning about these countries along with us.  Every week the kids and I are learning something new and I can't believe how much they are remembering!  I know we are making memories here :)
 

This week we decided on the Netherlands, actually I wanted to do Holland but guess what? Holland isn't even a COUNTRY!!!  See, I'm learning new things, things I probably should've leaned in school.  So since Holland is actually what they call an area of the Netherlands, here we are.  Let's learn a few fun facts-
  • The Netherlands actually have 2 capitals.  Amsterdam (52.37°N/ 4.89°E) is the official capital but the Hague was the first capital since 1584 and where the government is run.
  • The official languages are both Dutch and Frisian but over 80% of people speak English as well.

  • The name "Netherlands" means "low country" in Dutch.  That is because almost half of the country is below sea level and is only usable because of the 1,500 miles of dikes that keep the North Sea from flooding in.  The highest part of the country is only 1,000 ft above sea level.

  • Because of the dikes, the Dutch (as people in the Netherlands are called) built windmills to run pumps keeping the areas dry.  At one point there were 10,000 windmills in the Netherlands.  There are still over 1,000 in use today.

  • Holland is known for its tulips.  The Netherlands is the #1 producer and exporter of tulips and flower bulbs in the world. 
 

    • Bikes are a very popular way to travel in the Netherlands (probably because it's so flat!).  There are specially designated bike paths called "fietspaden" where only bikes are allowed.
    • There are over 1,000 museums full of Dutch painters like Van Gogh, Rembrandt, Vermeer and Mondrian. 

      • Dutch people are some of the tallest in the world.  Men average 6ft and women almost 5ft 6 inches.
      • The Dutch were avid explorers.  They were the first to discover Australia and New Zealand.  New York was once also a Dutch colony called New Amsterdam.
      They explored the world and now so are we.  Luckily (or maybe not) we get to do it from the comfort of our own home- and we get to invite you along with us!!  C'mon let's go :)

      Sunday, April 21, 2013

      Language lessons and lunch!

      Ohayou goza masu!!


      That means Good Morning!  I hope you all had a great weekend!  We are going swimming (it's going to be in the 80's today!!) but first I've got some more work to do on Japan!!  Let's learn some common words and phrases and then I have a great recipe for Teriyaki Chicken from scratch!! 

      Yes- hai    No - iie     Thank You- Arigato    Goodbye - Sayonara
      Happy Birthday - Tanjyoubi omedetou gozaimasu 
      Enjoy (your meal)- wo tanoshinde kudasai  
      I Love You- Daisuki Desi
       
      1 - ichi      2- ni       3- san      4- yon     5- go    6- roku
      7- nana (or shichi)  8- nachi     9- kyuu    10- jyuu
       
      Yellow- ki iro    blue- ao      red- aka      white- shiro
      black- kuro    grey- hai iro     purple- murasaki      green- midori
       
       
      Now your treat for being so good....
       
      Teriyaki Sauce (from scratch!)
      For the recipe you will need:
      (The ingredients used are pictured in the next recipe)
      • 4 T honey (we were out of honey so I used Golden Syrup)
      • 4 T Mirin (a sweet rice cooking wine you can fine in Asian aisle)
      • 4 T Sake (You'd probably find this in the alcohol section)
      • 4 T Soy sauce
      That's it!  Combine them all together and use as is if you like a dipping sauce or a marinade.  Or use it in this recipe I got from an interesting website called No recipes.  You should check it out- it had a lot of good recipes despite the name :)  Traditionally, Teriyaki is a grilled dish cooked on a hibachi (small charcoal grill) but this technique is cooked in a skillet. 

       It was delicious and it cooked the alcohol out of the Teriyaki sauce if you are concerned about that!!
       
      Chicken Teriyaki
      For the recipe you will need:
      • Homemade teriyaki sauce (see recipe above)
      • 3-4 T vegetable oil
      • Boneless chicken thighs or breasts
      • 3 T grated fresh ginger
      • 1/2 t salt
      • 2 T Sake for cooking
      1.  Combine the chicken, ginger and salt and let them sit for at least 30 mins.  Pat the chicken dry.
      2.  Heat oil in a heavy skillet set on medium heat.  Put chicken in hot oil skin side down and fry until golden on one side.
      3.  Turn over the chicken and add the Sake (or you could use water, chicken broth, orange juice)  Cover pan and let chicken steam until it is almost cooked through.
      4.  When the chicken is cooked most of the way drain any liquids that are in the pan. Turn your heat to high and add teriyaki sauce.
      5.  Let the teriyaki sauce boil and thicken and turn the chicken often so that it is all coated.  The sauce will thicken into a beautiful glaze and the chicken will be a wonderful mahogany color!!  Serve with rice and the any sauce left in the pan!!

      I love this recipe!  It always makes me feel good when I know what's in my food and this was so simple!!  Yeah, it was initially a little expensive because we don't normally keep Sake and Mirin on hand, but I found a small bottle of each at the Japanese market.  The sauce was RAVED about by my family and I've already had requests to make it again!!  I can only imagine that it could be doctored up in many ways- maybe some pineapple or orange juice?  Sesame seeds?  

      For dessert we had ice cream mochi.  Mochi is a sweet rice flour treat.  They are sticky and chewy and I really like them.  Ice cream mochi is that sticky, chewy stuff with ice cream in the middle!!   How can you go wrong? Ok, I'm getting hungry I need to stop!


      Have a wonderful weekend people!!  I'm going swimming :)


      Friday, April 19, 2013

      2 Field Trips and a bunch of fun projects!

      One Godzilla of a post!!


      I try to keep my posts pretty short whenever I can.  I don't like to read long lengthy explanations about things and you probably don't either :)  But we did soooo much fun stuff this week that I haven't gotten around to posting yet that I need to catch up!! 
      So here goes....

      Field Trip #1- Daiso

      A while ago I noticed a new store went up in South San Francisco.  It was named Daiso and it looked like a restaurant to me so I never really checked it out. 


      Well it turns out that it is a super cool Japanese variety store where A LOT of the items are $1.50 or under!!  So it seemed like a great idea for a field trip!  The kids fought the idea but two steps inside and they were in awe of their Mother's brilliant idea!! 

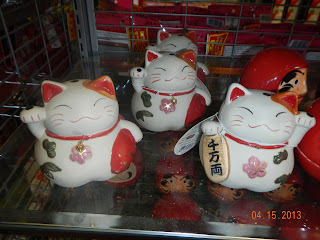
      There were toys, little statues, awesome lunch box containers and kitchen utensils, school supplies, gardening supplies, snacks and, well, the list goes on and on!!  Japan has some interesting takes on some items that we use every day!! 


      We bought a Japanese Calligraphy set, and some plain white paper fans that we incorporated into a fun project.

      Painted Fans
      For the project you will need:
      • plain white fans- you can buy these or just accordion pleat some white paper and staple the bottom.
      • watercolors
      • Japanese Calligraphy Set- this is totally optional.
      • Examples of Japanese calligraphy- google :)

      1.  Paint designs or just beautiful colors on the fan.  Let it dry for an hour or two (or overnight)
       
      2.  Try to copy an example of the calligraphy - maybe just a word that means something to you.  Here are a few examples.


      Beautiful and useful for the warm Spring days coming up!!


      Field Trip #2 - the Japanese Tea Garden

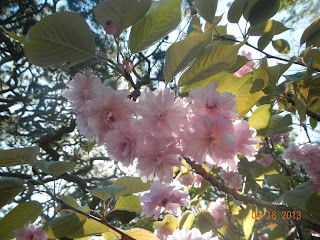
      It was a beautiful Spring day yesterday so after school I took the kids to the Japanese Tea Garden in Golden Gate Park.  I remember going there once for a school field trip, so I thought the kids would enjoy it too!  They sure did.  It is so beautifully done, quiet and peaceful with arching bridges and waterfalls.  Beautiful Cherry blossom trees in bloom reflected in koi filled ponds. 


      The kids and I explored all the paths and then had some iced green tea and almond cookies in the tea house.  The gift shop was a little tension filled because it was filled with beautiful ceramics that the kids just HAD to touch!! 


      I would have to say that their highlight was the bridge. This bridge is shaped like a rainbow and you have to climb up and over it.  My daughter asked me why they would make a bridge like that and my only answer (aside from "it's prettier) was so that boats could go under.  I can only assume they didn't have drawbridges in ancient Japan.  


      There was a large pagoda and other shrines.  Pagodas are Buddhist shrines that are meant to reach to the heavens.  Stacked rather symbolically like the many lifetimes it takes to reach full enlightenment.   There was just so much beauty everywhere and one man to thank. 


      The tea garden was originally designed as a 1 acre "Japanese village" exhibit for an International Exposition in 1894.  After the fair ended, the landscaper, Makoto Hagiwara, was allowed to live on the property and maintain and build on the gardens.  Mr. Hagiwara poured his heart and soul into it and built the gardens up into 5 acres of Japanese grace and beauty.  He and his family lived there for many years.  Unfortunately, in 1942, at the height of WWII, America decided that all Japanese Americans should be put into internment camps.  Mr. Hagiwara and his family were forced to leave their beautiful home.  After the war when the Japanese Americans were freed, Mr. Hagiwara and his family were not allowed to return to their house in the Tea Gardens.  That period was a sad time in American history and, of course, for the Hagiwara family.  Thankfully, his beautiful work is still available for the public to visit and will remain a testament to Mr. Hagiwara's sense of beauty, grace and hard work.  I dedicate our next art project to him.


      Cherry Blossom Tree
       For the project you will need:


      • small branch from a tree
      • empty can or cup
      • plaster of paris or lump of clay
      • pink or white tissue paper
      • glue
      1.  Mix the plaster of paris and pour enough to fill your can about 3/4 of the way.  Or if using dough, put enough to fill can 3/4.
      2.  Stick your stick into can and make sure if you are using the plaster to keep it propped up.  We used tape to hold it where we wanted it.  Let it harden.
      3.  Cut the tissue into squares and then crumple them up into little "blossoms".  This is fun for any age.
      4.  Glue the blossoms to the tree and step back to admire the beauty! 

      Happy Spring!!